How to Make LINE Stickers with AI: Generation to Sales
For those who can't draw but want to make stickers, this guide explains an efficient workflow combining AI with the all-in-one tool 'いじスタ'.
Table of Contents
STEP 1: Generating Images with AI
When creating LINE stickers with AI, the first step is to establish a clear vision for your final sticker.
2 Key Points to Decide Before Generation
Before jumping into image generation, decide on the following two points. These will greatly influence your AI prompt and your workflow in いじスタ.
1. With or Without Background: Decide whether you want a photo-like design that includes a background, or a character-only sticker where the background is removed.
2. With or Without Text: Decide whether you want the AI to draw text directly into the illustration, or if you prefer adding clear, readable text later using いじスタ.
Once you have decided on these directions, proceed to the actual steps below.
Pattern 1: With Background
Suitable for cases where you want a photo-like atmosphere or want to show the background as part of the design. In this case, you don't need to worry about the background—just generate the images you like.

Pattern 2: Without Background
Choose this if you want to create 'sticker-like' images by cutting out only the characters. Since AI currently struggles to output images with a completely 'transparent background' (PNG transparency), you need a few tricks in your prompt.
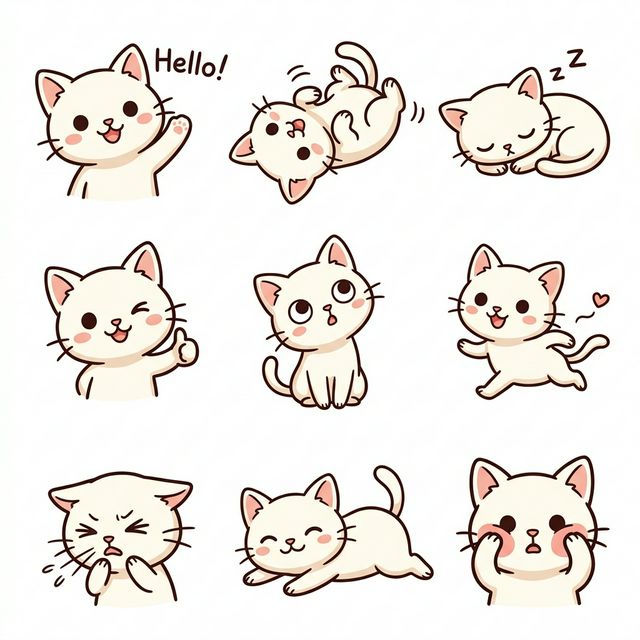
4 Tips for Successful AI Generation
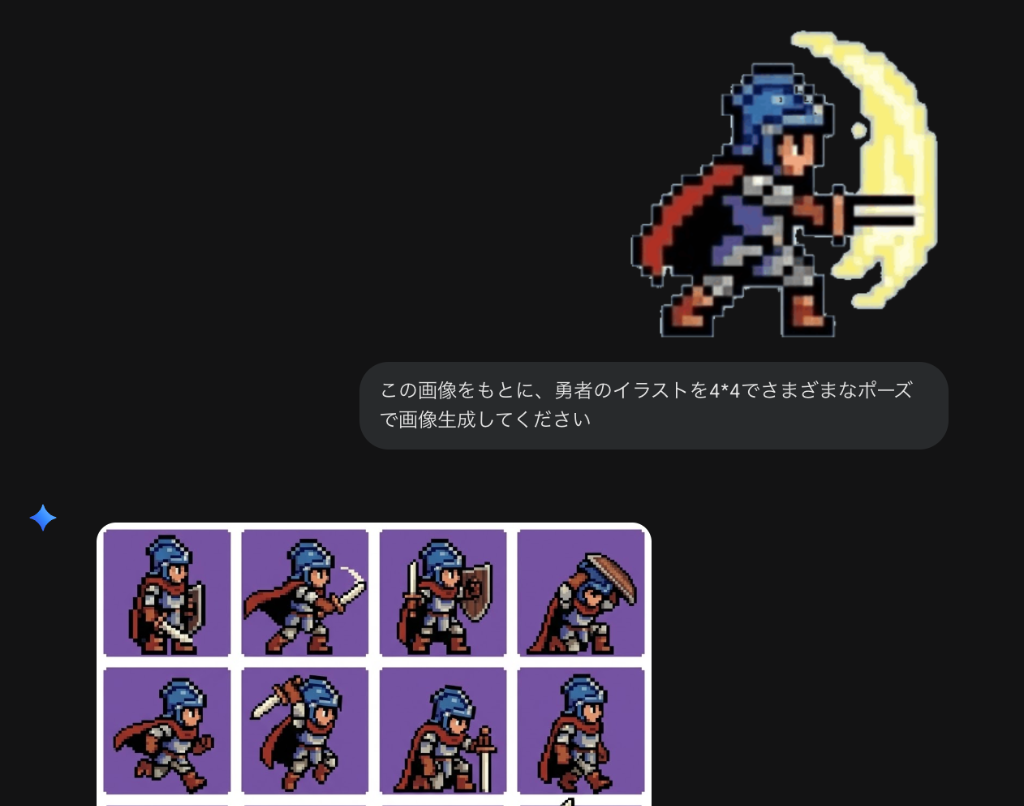
1. Provide a Reference Image (Most Important): Directing the AI by providing a base character image is far more effective than prompts alone. Upload your favorite image and instruct: 'Generate based on this character' to maintain consistency while mass-producing stickers.
2. Specify Background Color for Removal: For stickers requiring background removal, specify a color not used by the character, such as 'green background' in your prompt. This simplifies the process later.
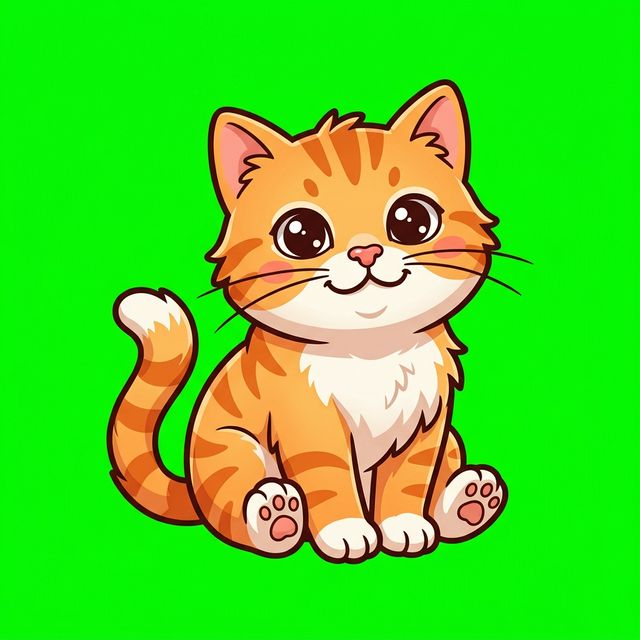
Notes on AI Backgrounds: Since AI backgrounds often have subtle variations, use いじスタ's 'Quantization' or 'AI Background Removal' for a clean finish.
3. Generate Multiple Poses at Once: Use terms like 'character sheet' or 'multiple poses' in your prompt to efficiently create numerous illustrations in a single generation.
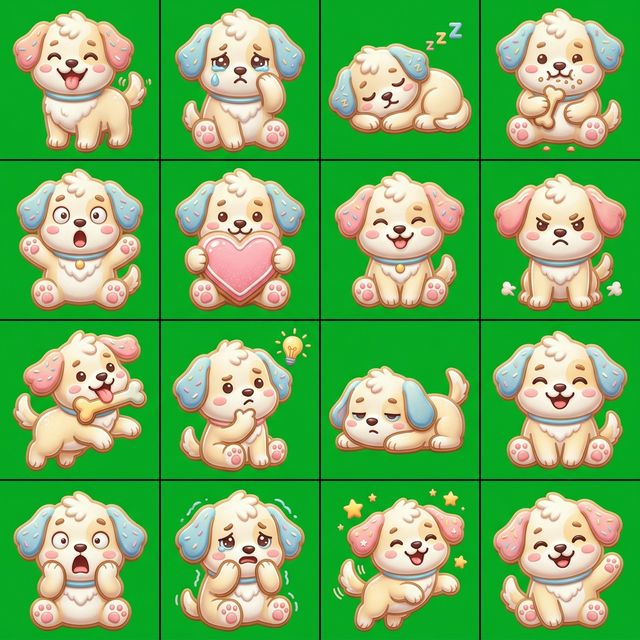
You can easily remove any borders or lines added by the AI using いじスタ's 'Grid Split' or 'Auto Split'.
4. Including Text: Modern AI tools can often generate accurate letters within images. If you prefer high-quality text design, generate only the illustration first and add text later in いじスタ.
Practical AI Prompt Template
Here is an example prompt structure that generates multiple different poses at once, with a green background for easy chroma keying. You can copy and paste this into AI tools like Gemini, ChatGPT, or the buzzy "Nano Banana" (Gemini 2.5 Flash Image) generator. Feel free to tweak the parameters to create your own original character!
# -----------------------------------------------------------------
# General Image Generation Prompt
# Theme: 3D Icing Cookie-style Puppy
# -----------------------------------------------------------------

# Prompt Structure
# AI will follow this structure to translate and integrate the parameters below.
prompt_structure: >
  A 4x4 grid of 16 individual square digital illustrations.
  Overall Theme: #base_theme#
  Subject Details: #character_details#
  Texture & Style: #texture_style#
  Color Rules: #color_rules#
  Background: #background_setting#
  Constraints: #negative_constraints#

# -----------------------------------------------------------------
# Parameters (Customize these fields)
# -----------------------------------------------------------------
parameters:
  # 1. Base Theme / Character
  base_theme: "A deformed, extremely cute puppy."

  # 2. Poses and Elements
  character_details: >
    16 different poses and expressions suitable for LINE stickers (e.g., happy, crying, sleeping, eating, surprised, holding a heart, head tilted).
    Each puppy is depicted with a plump, rounded shape.

  # 3. Texture and Style
  texture_style: >
    A 3D icing cookie texture.
    The surface is smooth with a slight gloss, like a sugar coating.
    The 'plump' thickness of the icing and the rounded edges of the cookie are emphasized.

  # 4. Color Rules
  color_rules: >
    Based on soft pastel colors overall (e.g., pastel pink, blue, yellow, cream).
    The base of the dog is a cream or brown cookie color, with colorful icing used on the decorated parts.
    Shadows and gradients are soft and natural to express the 3D effect.

  # 5. Background Setting
  background_setting: "All backgrounds are solid green. No decorations."

  # 6. Constraints
  negative_constraints: "Do not include any text, letters, numbers, symbols, logos, or watermarks in the illustrations. Pure illustrations only."

# -----------------------------------------------------------------
# Examples of Usage
# -----------------------------------------------------------------
# * To specify a breed: Change base_theme to "A deformed, cute Toy Poodle."
# * To add text: Change negative_constraints to "Add short greetings (e.g., OK, No, Thanks) in icing letters on each panel."
# * To change colors: Change color_rules to "Monochrome icing for a cool impression."
STEP 2: Background Removal & Splitting
Process the generated AI images into individual stickers suitable for LINE. There are two main processing patterns depending on the complexity of the image and the background state.
Workflow Order & Tips
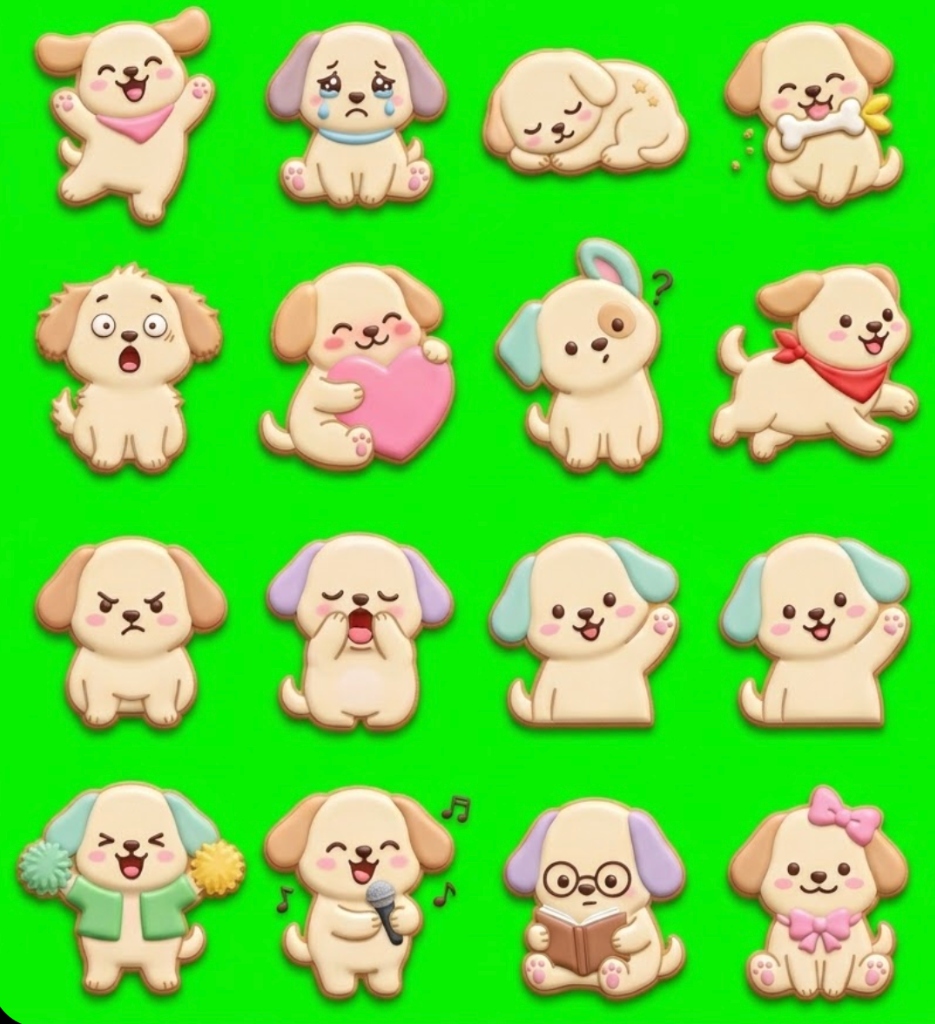
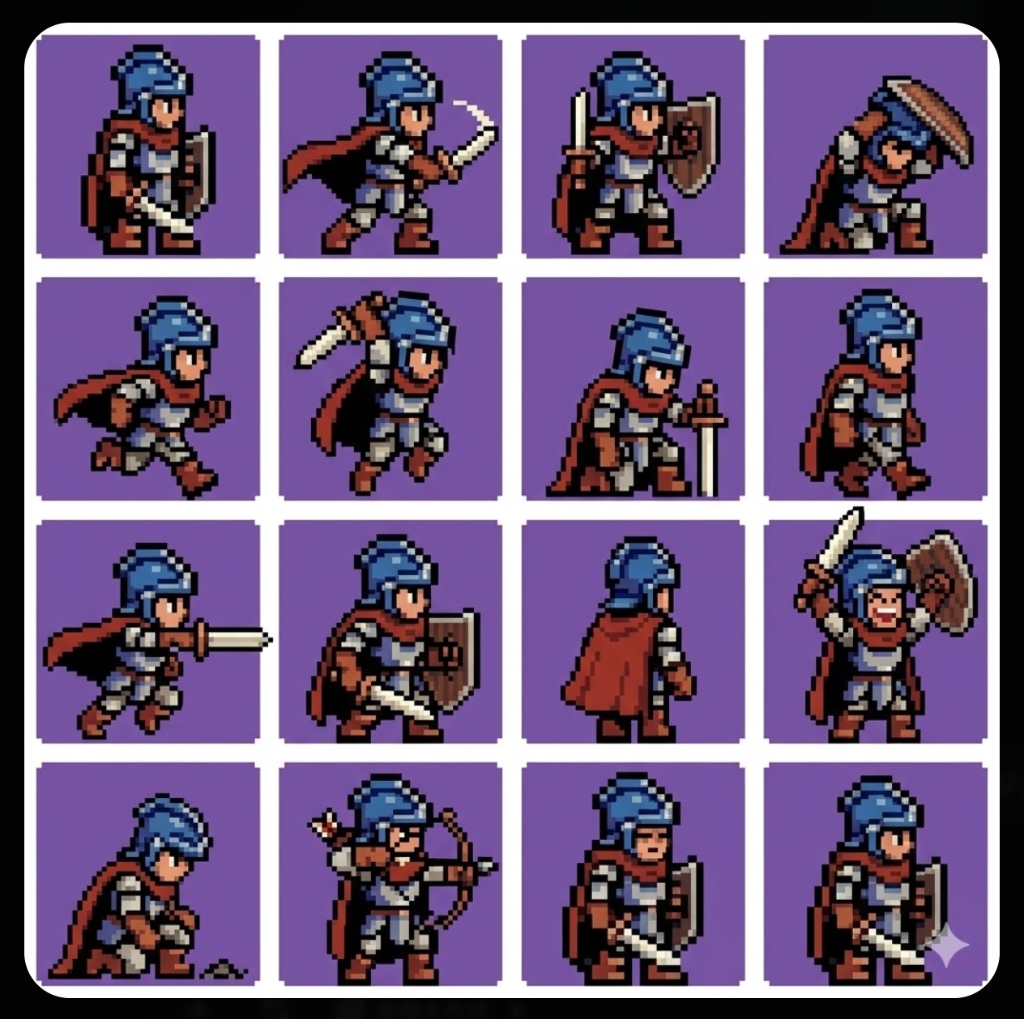
Pattern A: Remove Background First (For simple images): If the background is a solid color and grid lines are minimal, removing the background before splitting saves time.
Pattern B: Split/Crop Margin First (For images with grid lines or borders): If the AI added unwanted borders or frames, it's recommended to follow these steps to remove them first. This ensures a much cleaner background removal process afterward.
Workflow Steps for Pattern B:
1. Use 'Margin Crop' to cut off unwanted outer frames.
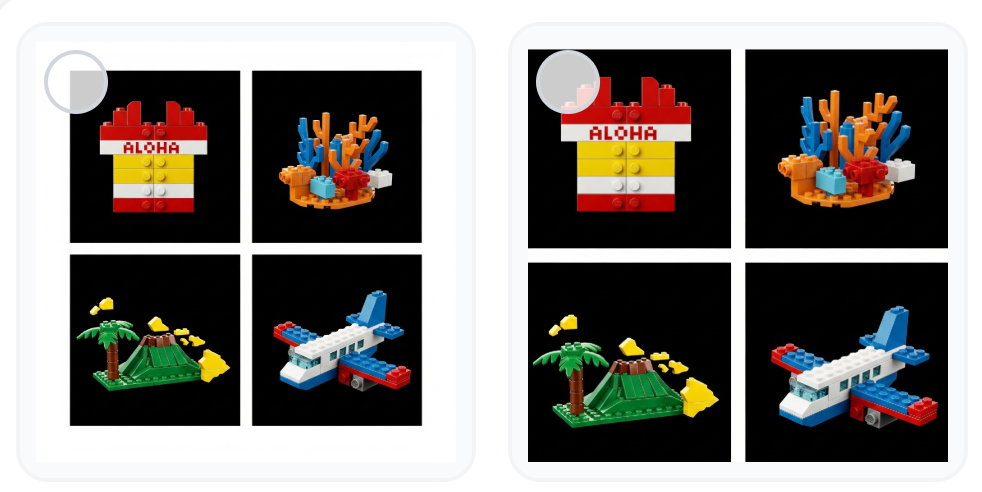
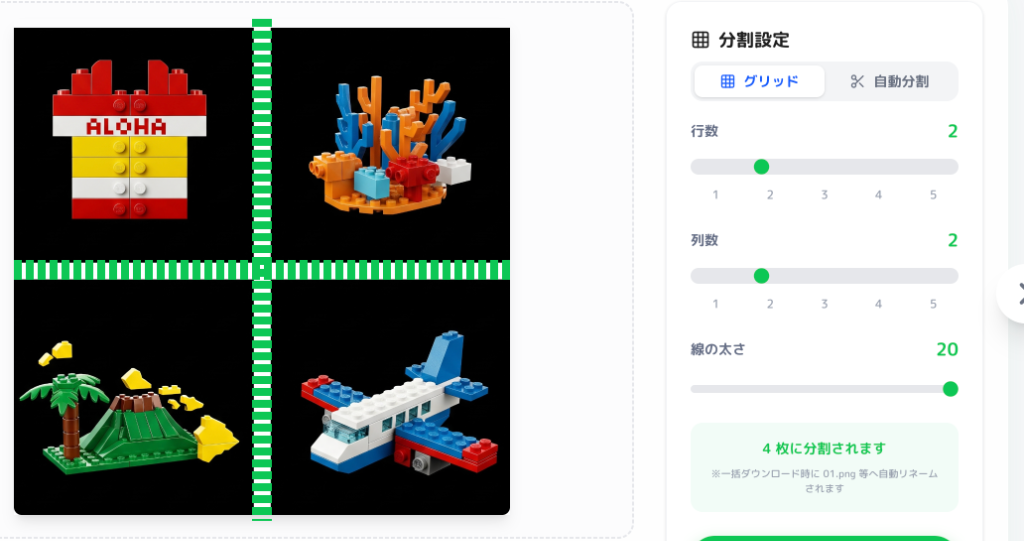
2. Adjust 'Grid Thickness' in Grid Split to wipe out internal unwanted lines.
3. Apply Background Removal to the individual images (Bulk Action is recommended).
Removing Lines with Bulk Split: Adjusting the 'grid line thickness' in いじスタ's split function allows you to wipe out unwanted AI-drawn lines in one go. You can then apply background removal to all images at once using the 'Bulk Action' feature.
Choosing the Right Split & Removal Tools
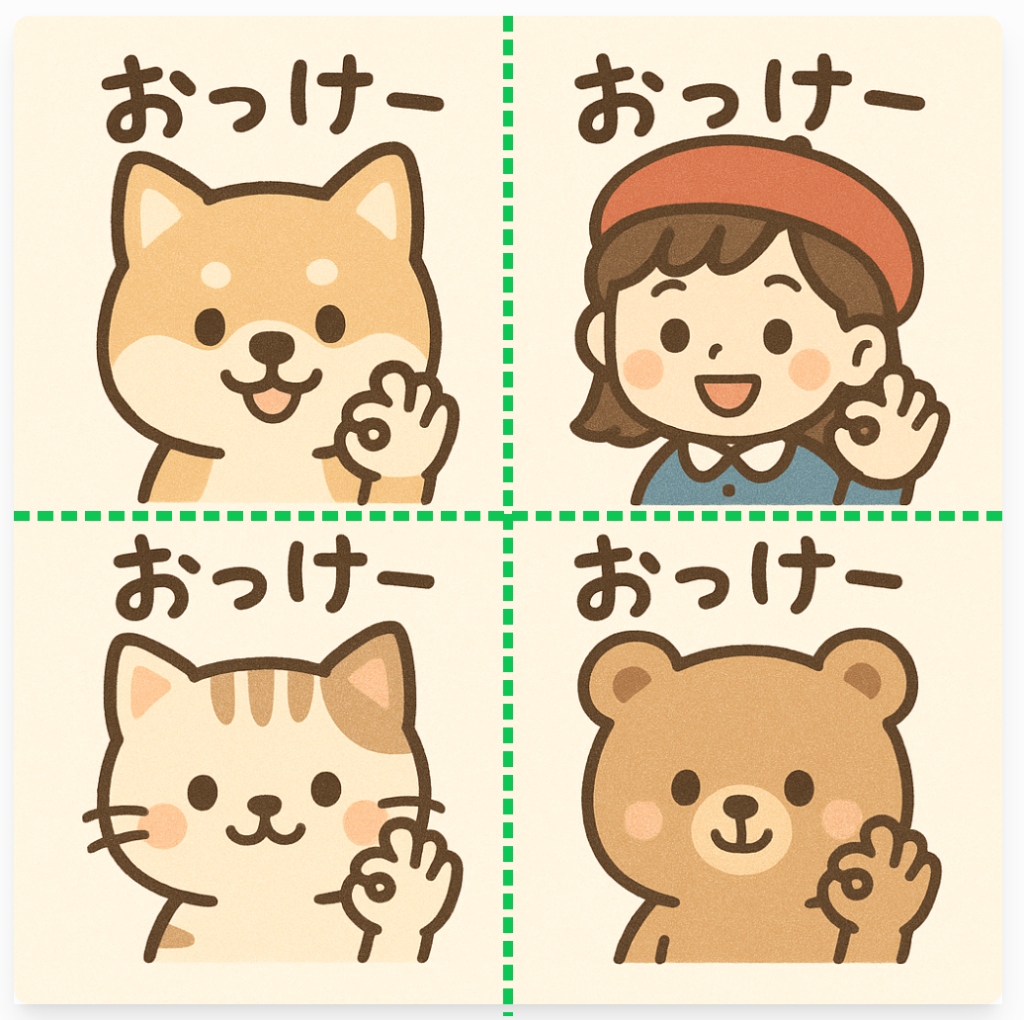
Grid Split: Best for neatly aligned images. It cuts accurately while removing boundaries.
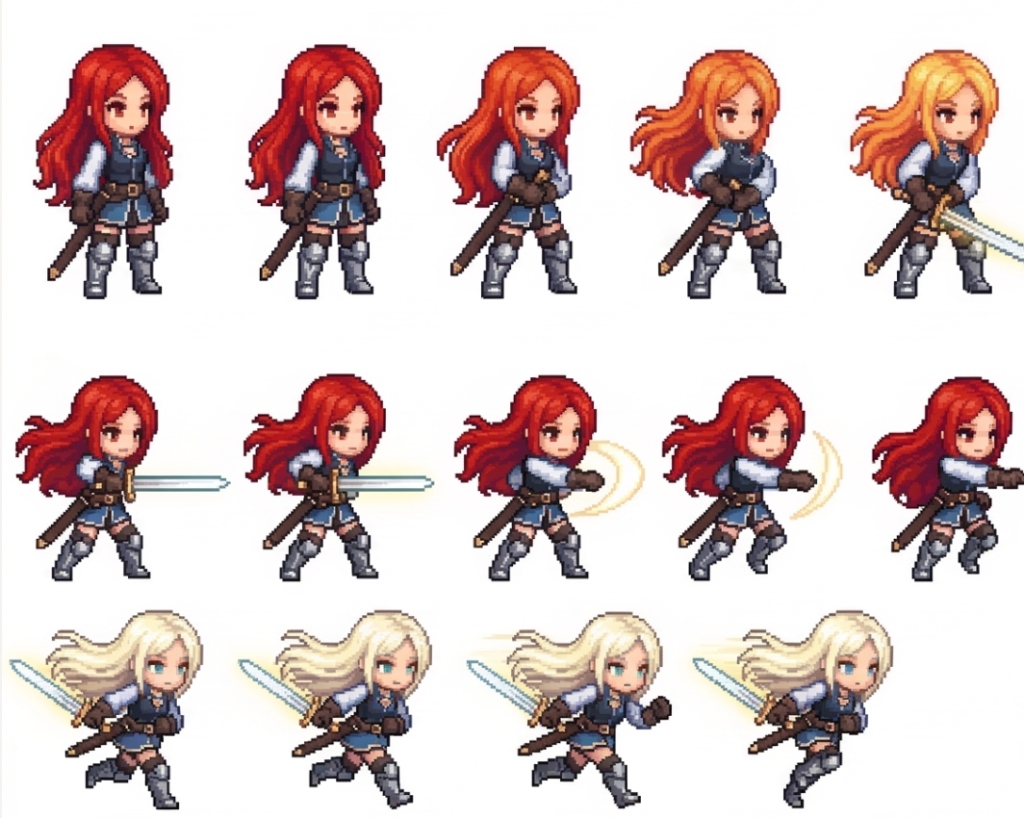
Auto Split: Perfect for irregularly placed images. One click lets the AI detect character positions and cut them out.
Increasing Auto Split Accuracy: Try removing the background first. A transparent background helps the system locate illustrations much better, drastically improving detection accuracy.
Background Removal Tools: いじスタ provides 'Chroma Key', 'Eraser', 'Browser AI Removal', and 'Advanced AI Removal'. 'Browser AI Removal' is generally recommended for the highest quality. Check this guide for more details.
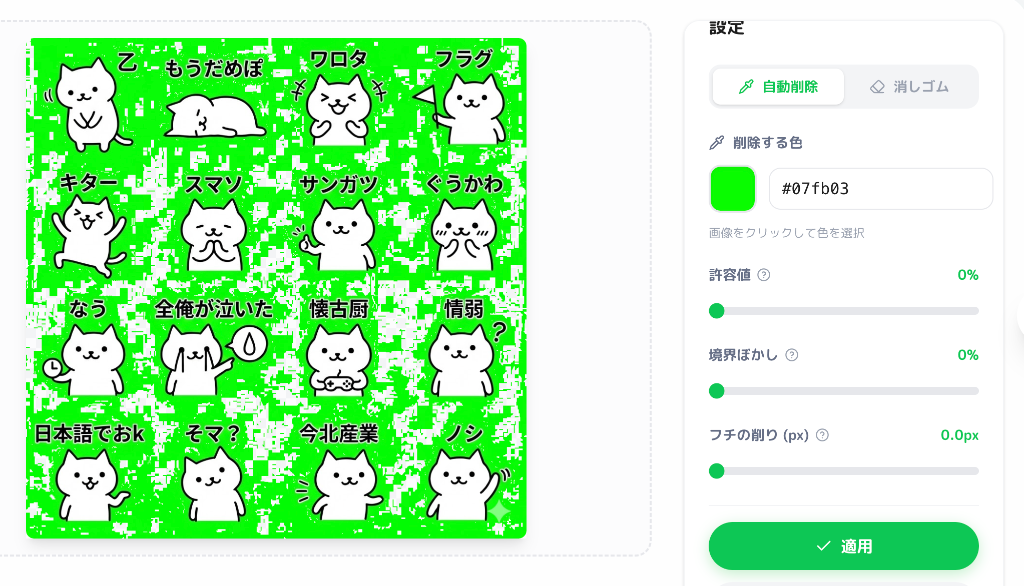
Quantization is Essential for AI Images
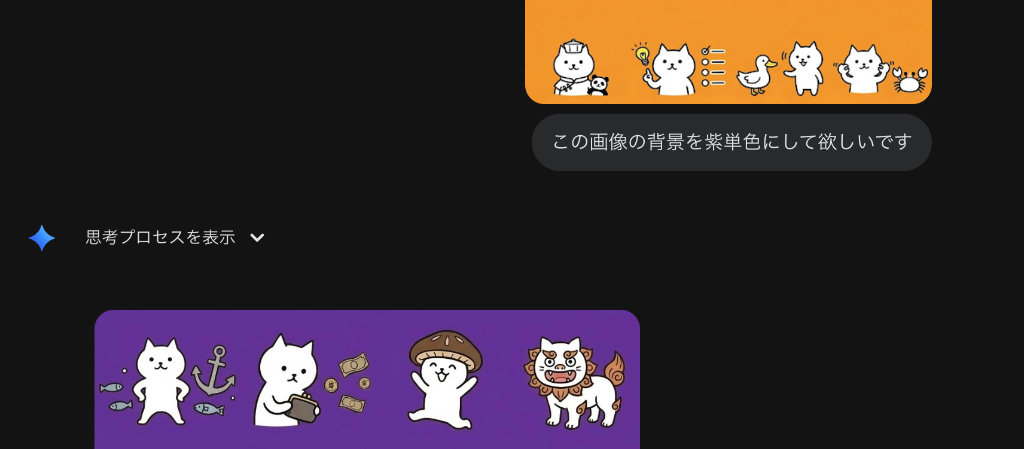
AI images often have invisible 'noise' in backgrounds, making clean chroma keying difficult. いじスタ's 'Quantization' feature unifies these colors into a single code, making 'Chroma Key' background removal significantly more successful.
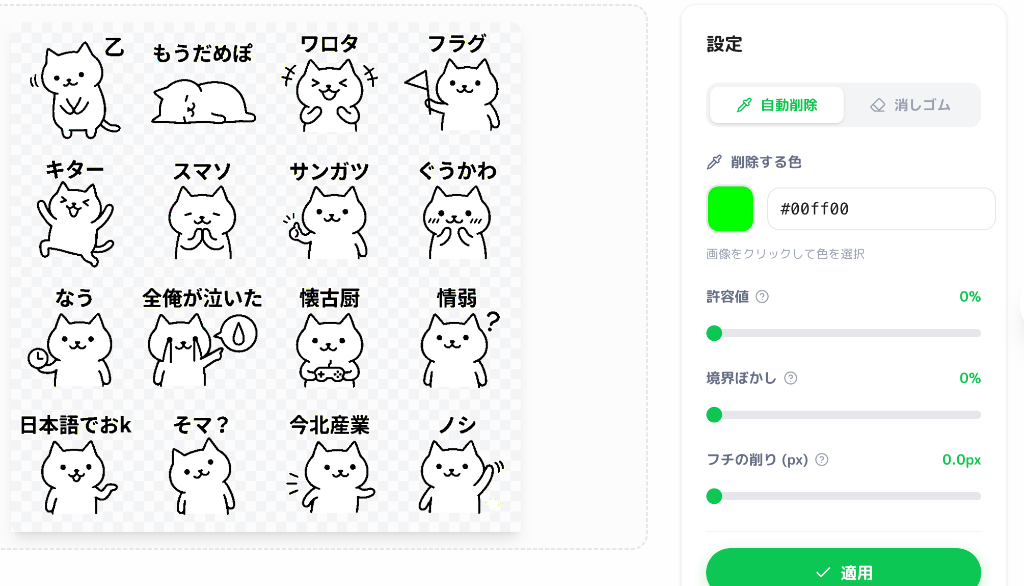
If your character shares the same color as the background (e.g., white background and white eyes), it might become transparent. In such cases, use the newer 'Browser AI Removal' or re-generate the image with a different background color.
STEP 3: Finalizing (Margins & Proportions)
Prepare your processed illustrations with the correct sizes and file names required for LINE sticker applications.
Margin Adjustments & Positioning
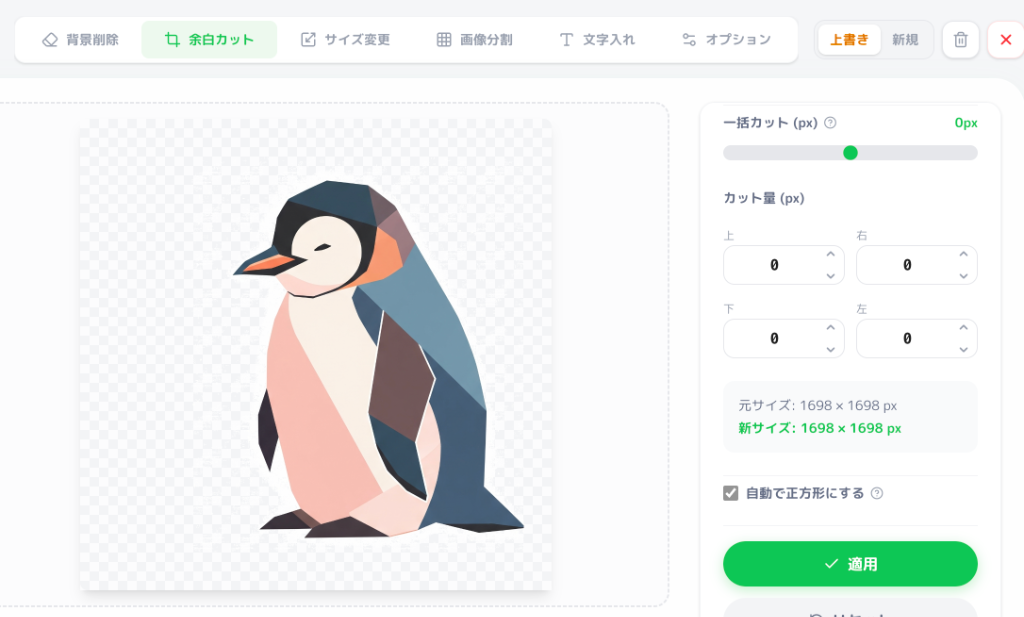
The 'Convert to Square' button instantly balances all images into perfect squares. This prevents distortion when resizing to final LINE dimensions.
Adding Margins (Negative Input): Entering a negative value in Margin Adjustments allows you to add space. This is very useful if you want to shift a character down and create a wide transparent space at the top for text. Added margins are automatically transparent.
One-Click Conversion to LINE Sizes
いじスタ can automatically generate the three required sizes at the click of a button:
1. Sticker Image: Auto-adjusts to max W370 × H320 px without distortion.
2. Main Image (W240 × H240 px): Select one and click 'Main' to create.
3. Tab Image (W96 × H74 px): Similarly, click 'Tab' to create.
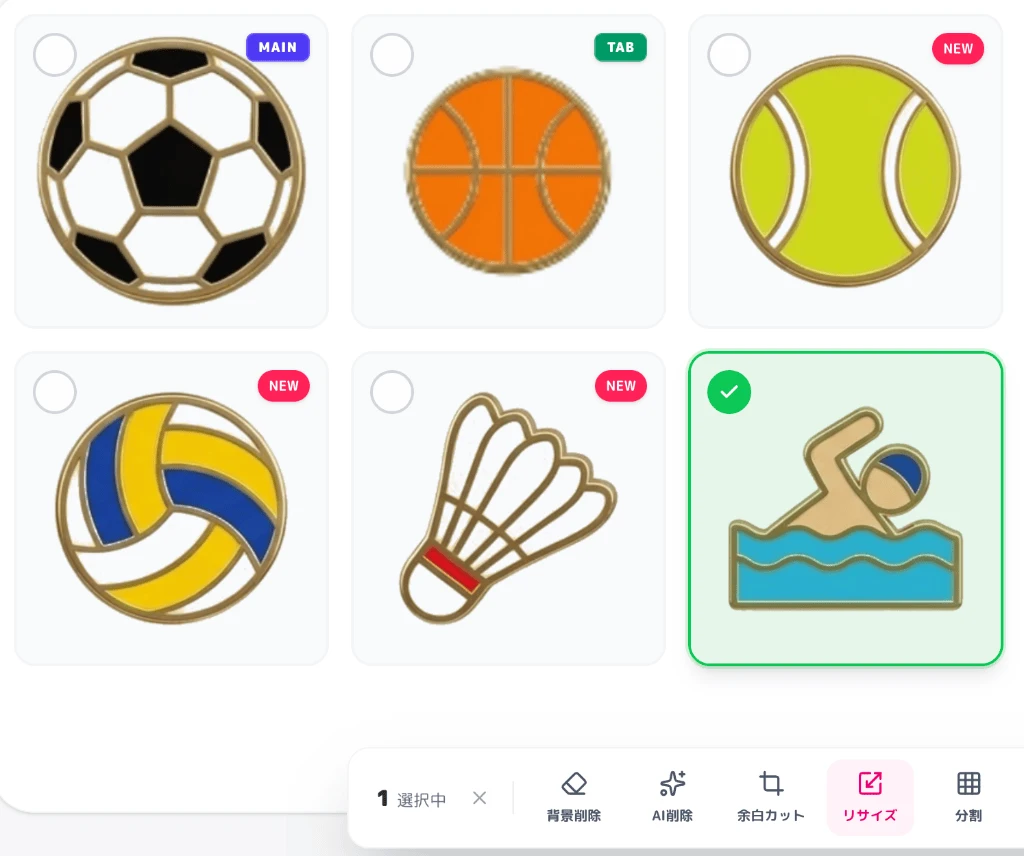
Use 'Save as New' for Main/Tab Images!: Since these are smaller than regular stickers, choosing 'Overwrite' will destroy your original high-resolution sticker image. Always switch to 'Save as New' to generate a separate file.
STEP 4: Adding Text
If you didn't include text during generation or want to customize it, use いじスタ's text input feature.
Designing Readable Text
Utilize the margins created in STEP 3 to place text cleanly without overlapping the illustration.
Adding Outlines: LINE backgrounds vary by user (light, dark, photos). Always add an outline (border) to your text to ensure it remains readable on any background.
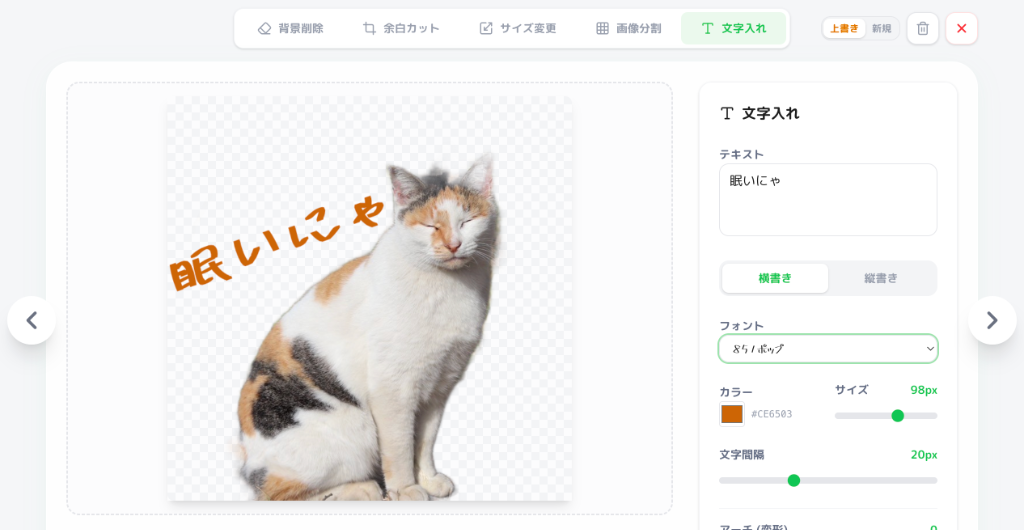
いじスタ lets you easily switch between 'Horizontal' and 'Vertical' writing styles. For font choices and readability tips, see our complete text overlay guide.
STEP 5: Bulk Save as ZIP
Finally, export your images to apply to LINE.
Filtering & Bulk Export
Use the 'Filtering' feature to easily check if any Main, Tab, or Sticker images are missing.
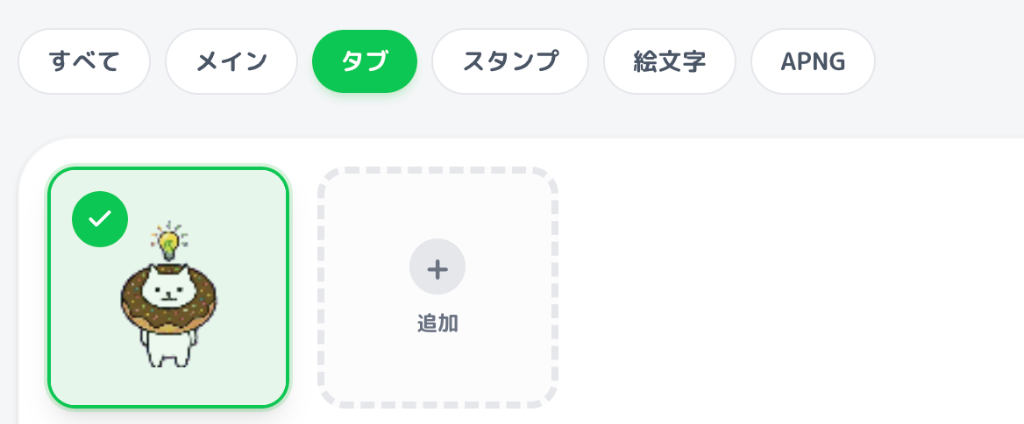
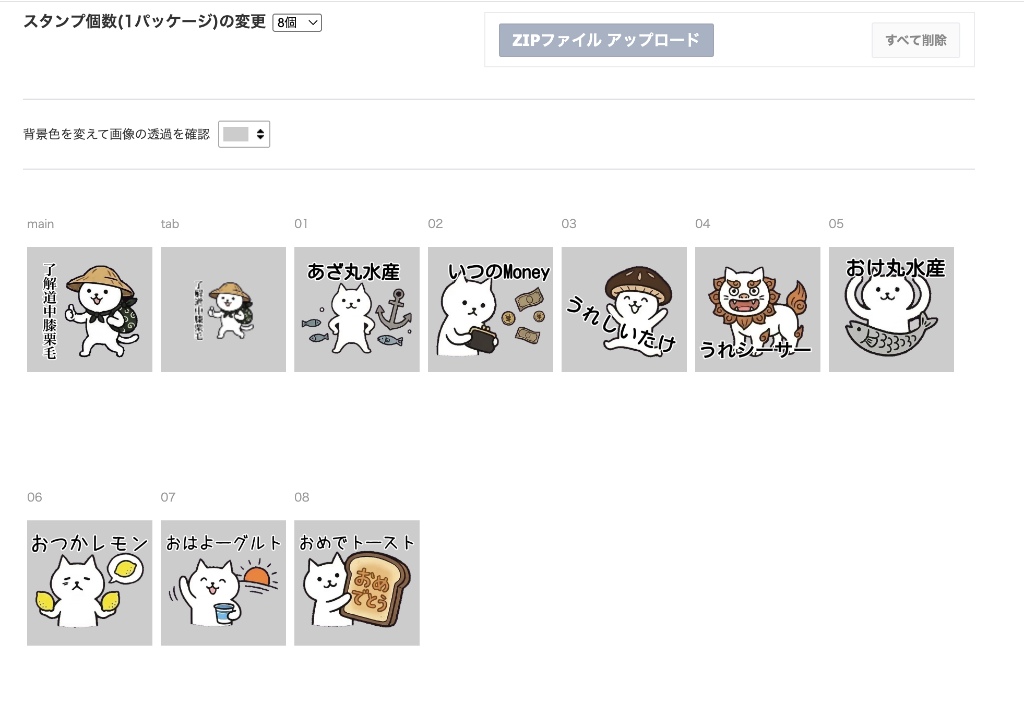
Selecting all images and clicking 'Save' downloads them as a single ZIP file. いじスタ automatically assigns required names like '01.png... main.png / tab.png', so you don't have to rename files manually.
Simply upload this ZIP file to LINE Creators Market to reflect all images instantly.
STEP 6: Apply at LINE Creators Market
Use the images saved from いじスタ to start selling your stickers.
Final Checkpoints for Application
First, visit LINE Creators Market and register as a member.
Sales Application: Upload the bulk registration data created in いじスタ.
AI Content Declaration: In the application settings, always select 'Yes' for the 'Are you using AI-generated content?' question. Forgetting this may lead to rejection.
Using Tag Settings: Don't forget to set 'Tags' (Suggest Keywords). Proper keywords help users find your stickers more easily and increase usage.
Once your stickers pass the review and are on sale, enjoy using them yourself and gifting them to family and friends!